Showing posts with label nail polish. Show all posts

Wednesday, June 25, 2014

The Latest Technology in Nail Art!

Hey Lovelies!

So here I am again with another new post (yay!) and some exciting news (yay!) and I'll hopefully be posting new stuff on a more regular basis, because I'm testing a TON of stuff right now!:) My husband is trying to convince me to start vlogging... So yeah... we'll see how that goes.

Anyway, you all know how much I *love* nail art and doing my nails! Well, now that I'm a mom, my time is extremely limited (and valuable) so I don't have all the time I used to to make sure everything is perfect. Basically, I have a short amount of time, and if I screw up OH WELL. lol no time to go back and remove and start from scratch. Which is why I am sooo excited to share this new tool with you! This will revolutionize how you do nail art!

If you're like me, your one hand probably looks awesome, and the other hand (done by your non-dominant hand) looks... well, not as good ;) The awesome mavens over at Julep invented....


The Plie! OMG It's like using a pen! Not all those regular, hard to use nail polish cap/brushes. Where has this been all my life?? How has no one else invented these yet?

The good news is that you can have your VERY OWN PLIE as they hit the market TODAY!! (yay!!) And even better news they will fit the Julep polishes you already have!!

So go to Julep's site! Pick up your own! And buy some of their fancy new summer polishes as well!!

Have you tried The Plie yet? What are your thoughts? Do you think you'll pick one up?


Friday, October 12, 2012

Flashback Friday: Glitter Removal Revisited

Hi Lovelies! Can you believe I've been blogging here for almost a full year?? Omg, it seems crazy to me! What started on a whim as a "new hobby" has developed into so much more! But enough reminicsing for now, more for another post. But today for Flashback Friday, I wanted to flashback to a previous post! This was actually from my Q&A series and was originally posted last December; however, I still get questions all the time of how I remove glitter polishes! So, without further ado, here is what I shared with you all last year:

Today's question comes from on of my dearest friends @DivaMommyTweets who is documenting her first pregnancy at "A Mommy in the Making" blog If you haven't seen it yet, you should totally check it out! We are just days away from finding out the sex of her baby! (I'm thinking BOY but we will hae to wait and see!!)

So on to the Q&A!

Q: I have such a hard time removing glitter polishes. I'll usually just rub polish remover on them and buff the rest out. Do you have a better way to do it?

A: Thanks so much for your question, Diva, I must say that glitter polishes are some of my favorites!! I love small glitter, big glitter, silver glitter, colored glitter--love love love all of it! Unfortunately, it is a pain to remove. This is in no way my secret tip, I found it from reading stuff online; but I can vouch for it and say that it totally works! *drumroll please* The foil method!! To do this, you'll need at least five cotton balls (one for each finger and thumb of one had. You can use ten, or just re-use the five for the other hand:), strips of aluminum foil, and nail polish remover (I use 100% Acetone, because I don't mess around with removal;). Get each cotton ball saturated with the acetone and set on the nail. Then wrap a piece of foil around the finger and ball. It's easier to do one hand at a time. Wait for just a few minutes (like the time of a commercial break if you're watching TV) then unwrap the foil, slide off the cotton ball (with a little pressure on the nail) and Ta-Da! Glitter removed!!! I've done this twice now, and it works like a dream! No more scrubbing my nails, no more picking pieces off, just a good clean swipe! The process looks kinda sillly, but it definitely works.


Now how about everyone else? What are your secrets to removing glitter? Have you tried the foil method? Did it work for you? Does it need to be foil? Can you wrap the cotton balls in saran wrap or something else? Does it need to be cotton balls or would cotton pads work, too? Let me know what you think!

Thursday, March 15, 2012

Color Club Hydrangea Kiss Swatch

Hello, Lovelies! So the title promises a nail polish swatch (which, I promise I will get to:) I got this nail polish from a giveaway on a lesser known blog, so I first want to start this post with sharing her blog with you!

Thoughts of a Midwestern Girlie Girl was one of the first blogs I followed when I started out on my own blog journey several months ago. I'm honestly not even sure how I found it, but when I read D's profile description, it sounded just like me and I instantly wanted to be her friend! She posts a lot of different nail polishes and nail designs with some other fun stuff and recently joined Bloglovin (which, you know, I am a huuuuuge fan of!) I love the simple layout of her blog, and she is just a fun person--well, for as much as I can tell by talking to her on Twitter:)

Anyway, she had a giveaway last month, and I won!! (February was sooo good to me! I won like three giveaways in a row! lol) I got a polish from Color Club! This is my first ever Color Club polish and I was super excited to get it in the mail.

The shade is Hydrangea Kiss and it's a beautiful, soft light blue--perfect for the Spring trend of pastels. I've loved blue polishes since I was 13 and wanted to wear a dark blue Wet 'n Wild polish every day of my life, lol. But I've had a hard time picking the right soft blue polish. Until I received this, Orly Snowcone was probably the closest I'd come to getting the perfect blue.

This color is simply wonderful though:
with flash
no flash
Needless to say, I will definitely be using this color in the near future! ---well, if I can fit a mani in among all my other Nail Challenges!!:)

What do you think of this shade? What is your favorite blue polish? Have you checked out Midwestern Girlie Girl yet??? :)

Monday, March 12, 2012

Nail Challenge Week 11: St. Patrick's Day Nails

Hey Lovelies!! This week's nail challenge is St. Patrick's Day nails! I'm sure a lot of girls are going to do four leaf clovers, Irish flags, lots of green, etc. I took a slightly different approach. I'm not Irish, but I'm a fan of Irish things... potatoes... sauerkraut (or is that German?:) lol... But my FAVORITE Irish thing is LUCKY CHARMS!! I was rarely allowed to eat this cereal as a child (too much sugar; my mom was all about feeding us "good" cereals like Kix and Life lol) so I now always have Lucky Charms in my house!

I started with a base of Essie All in One Base, two coats of NYC Quick Dry polish in Mulberry Street, then used my awesome Migi Nail Art pens (post on them coming soon! Promise!) to draw the marshmallows!:)
Left Hand
Right Hand
And here are a few closeups of ones that turned out pretty good:)
rainbow

pot of gold

heart

moon

horseshoe
And there you have it! My St. Patty's Day Nails!!:) How did you do yours? Are you having as much fun with the Nail Challenge as I am??:)

Wednesday, February 22, 2012

NOTD: Layla Magneffect Polish

Hi Lovelies! Happy Hump Day! I've always thought that was actually kind of a stupid name for a day, but whatever. It's Wednesday! The week is half over! (or half started? Is this like a half empty/half full kind of thing? lol)

Anyway, today's NOTD is Layla Magneffect Magnetic Polish. Now, before I show you the nails (as if you can't just scroll down to see the pictures lol) let's break this down a little. First, magnetic polish. I'd heard about it months ago, but also heard it was like $16 a bottle. That is well out of my price range; like I could get almost 8 bottles of Sinful Colors for that price!) So I'd decided right away magnetic polish was not for me until it got cheaper.

Which, okay another sidenote. I waited for "crackle" polish to get a little cheaper, and I bought the Sally Hansen kind this summer. Not. Im. Pressed. OMG it was HORRIBLE! It was chunky, didn't "crackle" quite right (or at all. I had three colors I tried). Took them all back to Walgreens. So, point of this paragraph? Cheaper is not always better. Now back to the topic at hand lol.

So anyway, I'd been hearing that there were some cheaper magnetic polishes out there lately and figured I'd get it eventually. But then I was at Ulta last week and....

Secondly, let's discuss this brand. Layla. Ever heard of it? (many of you polish gurus probably have;) I,however, have not. And I thought it was so funny on the bottle that English wasn't even the first language for the directions. Hahah. Apparently Layla is an Italian cosmetics company that has been in business for more than sixty years! (who knew?:)

Anyway the polish was $15.50. Whoa. In my opinion, still too expensive for a polish. But you know what? Maybe it's super fab. And how would you, my lovely readers, know if it's worth the money or not, if I didn't buy it to review for you!

And so, I did. I got the Changing Lilac shade.


It's a little thicker than regular polish. But this is good, because you really just need one coat. Which is also good since you use the magnet to make it work. Now, I'm not going to explain to you how magnetic polish works (mostly 'cause I don't know for sure. Science was never my strong point; I was a liberal arts major! lol And partly because I really want to believe it's magic:)

Anyway, here's how it works. Paint one nail, hold magnet (which is in the cap of the polish at the other end of the brush) above nail for at least 5 seconds... BAM! Design. I know China Glaze has a fun magnet that does all kind of different designs (see Traci's examples) But right now I just have kinda slanty lines in mine. Which is still pretty cool:)

no flash

with flash
Final thoughts? I think this magnetic stuff is soooo fun! Is it worth nearly $16? Eh.... I think it's fun to be able to say I now own an Italian polish... and I'm glad I tried it... but I would probably want to get some the cheaper versions to compare. Also, since I personally believe magnetic polish is just another fad (like "crackle" polish), I really wouldn't buy more than one of these. But as always, just my opinion:)

Have you tried this or another magnetic polish?? What do you think?? Fad or forever??:)

Tuesday, February 21, 2012

Nail Challenge Week 8: Corset Nails

Hi Lovelies! I posted a couple weeks ago about a nail challenge I was going to start that a bunch of other bloggers are doing this year! This week's nail challenge was "corset nails." *sigh* I Googled a bunch and found many pictures of what other girls had done. (There are actually a lot more images of "corset nails" than I would have expected! This is not something I would normally think to do for my nails!)

Now before I get too far into showing my nails for this challenge, I want to post a disclaimer. If this is your first time reading my blog, PLEASE do not judge my nail skills on this post!! I am perfectly aware they turned out quite horribly, and I promise I am not THIS BAD at painting  my nails. lol.

Here is a pic to show you how they turned out:
You should be able to see at least kind of what I was TRYING to do. Hahaha. Kinda a lacy look up the sides and the crisscross straps/ribbon up the back:) Here is how I got to this point.
After OPI base coat, two coats Revlon Top Speed Cotton

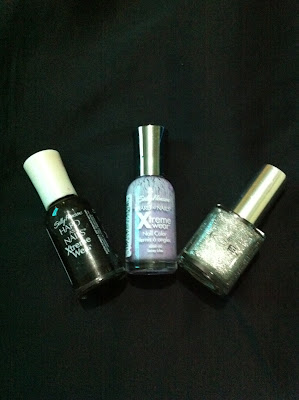
A coat of Sally Hansen Xtreme Wear Lilac on either side and bottom

Konad Black with Shany Plate SH21 on sides

Migi Nail Art pen to create crisscross
So, there you have it! The good news is, I attempted it and count that as doing this week's challenge! The better news? I was able to take it off with polish remover right away and make my nails look better! haha

Did you try this week's challenge? Have you done "corset nails" before? How would you have done them? :)

Saturday, February 11, 2012

Up for a Nail Challenge?

Hey Lovelies! I found this fabulous challenge that Kelly wrote about on her blog! It's a challenge to change your nails once a week to the assigned design of the week! I've done some of the designs on the list already (and some, I honestly have no idea how I'll do it!) But I thought it was something I definitely want to try!

Here's the list of nails throughout the year:


1. Jan. 1st - "Make it Sparkle" Mani.
2. Jan. 8th - French Tip Mani.
3. Jan. 15th - Color Block Mani.
4. Jan. 22nd - Plaid Mani.
5. Jan. 29th - Newspaper Mani.
6. Feb. 5th - Half-moon Mani.

7. Feb. 12th - "Valentine's Day" Mani.
8. Feb. 19th - Corset Mani.
9. Feb. 26th - "Vintage" Mani.
10. Mar. 4th - Polka Dot Mani
11. Mar. 11th - "St. Patrick's Day" Mani.
12. Mar. 18th - Skittle Mani.
13. Mar. 25th - Ruffian Mani.
14. Apr. 1st - Striped Mani.
15. Apr. 8th - "Easter Day" Mani.
16. Apr. 15th - Dotticure Mani.
17. Apr. 22nd - "Earth Appreciation" Mani.
18. Apr. 29th - Cartoon Mani.
19. May. 6th - Floral Mani.
20. May. 13th - Bows Mani.
21. May. 20th - Fruit Mani.
22. May. 27th - Splatter Mani.
23. Jun. 3rd - Ombre Mani.
24. Jun. 10th - Flag Mani.
25. Jun. 17th - Pride/Rainbow Mani.
26. Jun. 24th - Neon Mani.
27. July. 1st - "4th of July" Mani.
28. July. 8th - Gradient Mani.
29. July. 15th - "Rockstar" Mani.
30. July. 22th - Water Marble Mani.
31. July. 29th - Crackle Mani.
32. Aug. 5th - Needle Marble Mani.
33. Aug. 12th - Galaxy Mani.
34. Aug. 19th - "Bling" Mani.
35. Aug. 26th - Cupcake Mani.
36. Sept. 2nd - Tape Mani.
37. Sept. 9th - "We Remember 9/11" Mani.bui
38. Sept. 16th - Metallic/Magnetic Mani.
39. Sept. 23rd - Dry Marble Mani.
40. Sept. 30th - Animal Print Mani.
41. Oct. 7th - Patchwork Mani.
42. Oct. 14th - "Pink 4 Breast Cancer Awareness" Mani.
43. Oct. 21st - Spider Web Mani.
44. Oct. 28th - Halloween Mani.
45. Nov. 4th - Tribal Mani.
46. Nov. 11th - "Mustach, 4 Movember; Prostate Cancer Awareness" Mani.
47. Nov. 18th - Thanksgiving Day Mani.
48. Nov. 25th - Feather Mani.
49. Dec. 2nd - Glitter Sandwich Mani.
50. Dec. 9th - Snowflake Mani.
51. Dec. 16th - Red Mani.
52. Dec. 23rd - Christmas Mani.
- 30/31 - you've learned enough; go all out and show 2O13, what its all about!


So, who's with me on this?? Let's do it together!!

Thursday, February 9, 2012

NOTD: Hard Candy Matte Top Coat

We all know I'm obsessed with glossy, shiny, sparkly things (thus the name of my blog lol:) I've never been a huge fan of matte things... it just seems flat to me... But it had been a while since I'd bought any Hard Candy products, and I saw they had a Matte Top Coat that I thought would be fun to try. Actually, I thought it would nearly double my nail polish collection since all the colors I have that were shiny and lovely could now also be worn matte!
I started with OPI Base Coat then used two Coats of L'Oreal Mauve Star.

Funny story about this polish, A LOT of my polishes are just different shade of pink--baby pink, hot pink, glittery pink, etc. When I got promoted a couple years ago, I thought I needed my nails to be more "professional" for wok, so I got this because it seemed like a "grown up color." However, I just didn't like how it looked on my fingers. (p.s. clearly I'm over having "professional" nails at work. lol)

After using the Mauve Star, I put on the Matte Top Coat. You can see the differences here:
Ta-da! It's like a completely new polish! Both pictures are taken with the flash so you can fully compare them:)
I think this top coat worked really well and definitely provided the intended results. I need to be more careful using it because there were a few spots not covered as much as others so I still have a little shine coming through; but for my first time using it, I'm very happy with it:)

How do you feel about Matte Polishes? Have you used any? Do you prefer them to the shiny/glossy nails? :)

Tuesday, January 31, 2012

NOTD: Pretty in Pink

Today is just a quick post to show what I'm wearing on my nails right now!
As usual, I started with OPI base coat. Then I used two coats of Essie Fiji (one of my all time favorite pinks! It's just a soft feminine baby pink). Over that, I used two coats of Sinful Colors Glass Pink (which by itself hardly shows up, it's just so light. But over colors the shimmer really shows through!) Then I used CoverGirl Boundless Color City Lights just at the tips to add another dimension of colored sparkle. Finished with a coat of Seche Vite dry fast top coat and Voila!
with flash
without flash
The pictures honestly don't do it justice. They are waaaay more sparkly, shimmery, shiny in real life! I'm really happy with them:) However, with so many coats of polish, I'm sure they'll probably be chipping in no time, but for now my nails are pretty in pink!!:)

Friday, January 20, 2012

NOTD More Stamping

I have been wanting to do this post almost all day, but for whatever reason I could not get the polishes and my stamping to work together!! I know I keep saying how easy stamping is and I highly recommend it, etc. And really, I still do, but there was some major drama today. The stamps kept smearing on my nail. Not sure if was the polish of my base color or the new Konad polish (which worked just fine the other night) or if there's something wrong with my stamper... the polish was staying on the stamper and not going on my nail as right. Might need to look into that.

Anyway! Here we go!

The polishes I used were OPI Natural Nail Base Coat, two coats of Ulta's Tutu Cute, Konad Special Nail Polish white, Sinful Colors Nail Art Fashionista, and Seche Vite Dry Fast Top Coat.

For the design, I used Shany Plate SH23.
And ta-da! Here's how it came out!
As usual, the left hand looks better than the right:) But I keep telling myself it will get better with practice:)

And just for giggles, here's a picture of the mess left after all was said and done:)

Tuesday, January 10, 2012

Watermarbling--Disastrous or Designful??

By now I'm sure everyone has heard of watermarbling (if not, that's okay). There's a good chance you may look at nail stuff on Pinterest (it was allll over there for quite some time). The concept is really quite simple. You get a cup/glass of water (I used a cut off Solo cup); some say to use distilled, but I just used regular tap water that I let sit to room temperature. Then the fun starts! You take a few bottles of polish and let a drop of polish fall on the water.. it will form a film... then another drop... then another... until you have layer of color that looks kind of like a target pattern. With a toothpick or cuticle stick, you just make little swirling motion through the polish and the water, careful not to break the layer. With a taped nail, just dip/set the nail on the layer at an angle, pull out and BAM! Marbled design!

That's really the long story short version (I promise you can Google it and find much more detailed examples on YouTube:) But for tonight's post, I wanted to share with you some of the pictures I took from when I tried it for the first (and only lol) time!
I tried several different polishes to find ones that would work best (some don't spread, some just form droplets, etc.) As much as I love the (price) and color selection of Sinful Colors, I just could not get any of them to work! They were almost too thick.

The ones I used were:


Now, I'm not gonna lie and say "omg guys, this was soooo easy!! Everyone should do it!!" It took a lot of time and I redid some of my nails several times because they didn't look just right. It's not the hardest thing ever, and with the right amount of patience (and polish;) I'm sure anyone would be able to do it. But you definitely have to set aside enough time so you don't rush yourself.
right after removing tape
closeup of after tape
Also, even with the tape, I still somehow got it allll over my fingers (plus, I don't think I'm a really great taper to begin with lol). So I needed lots of Q-tips to clean up around the edges (and since, genius me used glitter polish, that kinda stuck to my skin more than some of the others:)
inside light

outside light

So, I apologize for not having a perfect picture of the completely cleaned up mani to show you, but I did this several months ago (pre-blog) so I just got some pictures to send my friend Katie while I was doing it (and trying to convince her that she should try it too!)
the mess at the end:)
Will I do it again? Sure, for a special occasion or if I'm bored and want to do something fun to my nails. But it's not something I can do every week just for the fun of it:) At least not unless I become a watermarbling superstar:)

How 'bout you? Have you tried watermarbling? Did it turn out for you? What polishes worked best? And what advice would you give to other girls wanting to try?


Friday, January 6, 2012

First Giveway--25 Follower My Favorite Things

Yay! It is finally the moment we have all been waiting for!!! My first ever Glitter, Gloss, and Glaze Giveaway!!! As promised, I said when I hit 25 followers I would do this! (as this week has gone on, I think right now I have 31 followers, so even more exciting!!)

For this first one, I wanted to give one lucky person some of my favorite things--and all things that have been mentioned/reviewed/loved by this blog. (****All items were purchased by me with my own money****)

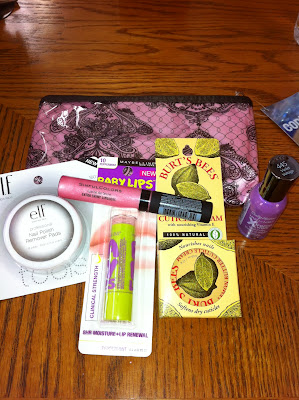
Here's the overall item picture and then itemized pix of everything:
Ta-da! Some of my fave things!
Cosmetics Bag

Maybelline Baby Lips in Peppermint
Sinful Colors Extra Shiny Lip Gloss in Creamsicle Cream

Burt's Bees Lemon Butter Cuticle Cream

e.l.f. Nail Polish Remover Pads

Sally Hansen Hard as Nails Xtreme Wear in Violet

One of my favorite polishes of allll time is Sally Hansen Hard as Nails Xtreme Wear in Lilac. It looks great with stamping; it did an awesome job with water marbling; it looks pretty by itself; it's pretty with glitter on top; it's doesn't chip very easily--it truly is my favorite polish! Sadly, I couldn't find lilac today, but Violet is just a pretty color and even has a little sparkly glimmer to it:)

So Rafflecopter is going to help with my first giveaway! The rules are pretty simple. You must leave a comment on this post in order to be entered. You can write a random fact about yourself or what one of your favorite products is. Then if you want additional entries, you can Like my Facebook page, Follow me on Twitter, and/or Tweet about this giveaway! So, that's a total of FOUR chances to win!

You do need to be 18+ and in the continental United States. Sorry to all my international lovelies, hopefully my later, bigger giveaways will be open to you, too! You have until next Saturday, January 14, 2012 at midnight EST time to enter! I'll notify the winner and he/she will have 48 hours to provide me with their contact/shipping information. Good luck!!!


LinkWithin

Related Posts Plugin for WordPress, Blogger...