Showing posts with label sally hansen. Show all posts

Sunday, July 15, 2012

Nail Challenge Week 28: Gradient Nails

Hi Lovelies! I've gotta tell you this was by far one of my favorite challenges so far... and it was one I was most nervous of! I cannot even begin to count alllll the times I've tried gradient nails before. I had Googled tutorials; I'd ready blogs; I'd watched YouTube videos... but no matter what I did, I just couldn't get them to look like everyone else's... as of last summer, I swore I'd never do it again.

That was, until it came up on this week's nail challenge. I knew I had to do it! I could not fail at a nail challenge! So I started doing more research again...

I'd pinned this picture to my I heart my nails board a few weeks ago, and this was my inspiration:
via
So here's how it started... I had Sinful Colors Snow Me White, OPI Kiss My Tulips, and Sally Hansen Xtreme Wear Sunkissed.
After one coat of the Snow Me White, I got a triangle makeup sponge and cut it down so it was about the same size as my finger nails so I could get ready for the next step!
So I had a piece of wax paper and I put the pink polish on top and the orange polish right below. A little thick so that it would not be completely absorbed onto the sponge but would be able to put on my nail (this was a big mistake I'd done in the past--I was painting directly onto the sponge and I never got it thick enough so it wouldn't go onto my nails just right)
Once it's on the sponge, I just "sponge painted" the nail. A little dabbing, a little blending. Then re-drip some polish on the wax paper for each nail so that I'd have a full coverage on all of them.
Ta-da! I only did one coat of the sponging, but you could probably do more if you wanted to make it darker or more intense. I just used a Q-tip dipped in nail polish remover to clean up the excess polish that ended up around my finger from the sponging.
Top coat and done! I absolutely love how this turned out! I started looking at other polishes and thinking of all the other gradients I want to try! I know it seems like a lot of steps, but I promise it's actually super simple and I know you all could do it!:)

Have you tried gradient nails before? What method do you use?


Thursday, June 14, 2012

Nail Challenge Week 24: Flag Nails

Ladies and Gentlemen of the USA ~ Happy Flag Day!!!! In honor of today's day (Thank you, Betsy Ross for designing an awesome flag), I have American Flags on my nails! This actually wasn't my first time doing flag nails... last 4th of July I attempted them as well.
Insert Star-Spangled Banner music here.... lol


So, how did they get to that point? Well, after OPI Base Coat, I did two coats of Sinful Colors GoGo Girl (still my favorite red polish to date).
Once it dried, I used CoverGirl Blue You (which, p.s. I got for $.25 at a yard sale;) to do the top corners over the red. I used two coats of this also to make sure the red was completely covered.
Even the colors just like this look pretty fun;) But after MORE dry time, then it was time to do the stars and stripes! I used my Sally Hansen Nail Art pen in Pearly White (it's too bad I accidentally picked that one up a couple months ago. I think plain white would've had more dramatic lines)
And finally! I used my Migi Nail art pens (yay!) I couldn't draw whole stars, so I just made dots (which honestly, if you're looking at a flag in the distance, don't they kinda look like dots??;)
There you have it! Hope you have a simply amazing flag day!! Even if you aren't an American;) What other flags would be fun to put on your nails? Canadian? Australian? Italian? :)


Monday, June 4, 2012

Nail Challenge Week 23: Ombre Nails

Hi Lovelies! This was probably one of my favorite challenges from the past month or so--finally one turned out that I really liked!

Now you may be wondering what an ombre mani is. Or, perhaps you "know" what it is...but you may be wrong. The Swatchaholic did an amazing post a couple weeks ago describing the differences in ombre, skittles, and gradient. Many, many people are confusing ombre and gradient. So, if you think an ombre mani is when the color changes on the nail... I'm sorry to inform you, that is actually a gradient mani (which p.s. is coming in week 28;) When you Google "ombre" mani, sooo many of the pictures are gradient! So this is definitely a common misconception!


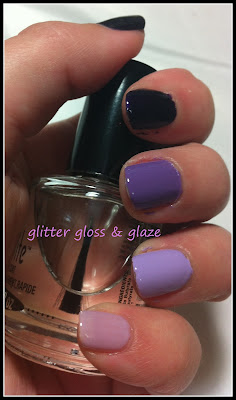
The whole point to ombre is that it is a gradual change of color.. so each nail is from the same color family but changes from dark to light or light to dark. I really thought  my nails would be pink this week 'cause I figured I'd have the most variety of shades there... HOWEVER, when I saw some of my purple polishes together, I knew I had a winner!


The polishes used were LA Girl French Nails Purple, Sally Hansen Xtreme Wear Lacey Lilac, Ulta Tutu Cute, Revlon Top Speed Grape, and Orly Out of This World.
I did the left hand dark to light from thumb to pinky and the right hand was light to dark from thumb to pinky!

The lighting isn't perfect... but I promise in real life it looks so fun! I never would've thought I'd like to have a different color on each nail, but I think it is sooo pretty!! When I buy more polish, I'm definitely going to consider how it works with other shades I have so I can do ombre manis in other colors as well:)

Have you done ombre nails? Did you know the difference between ombre and gradient? What colors would you have used to do this challenge?:)


Sunday, April 8, 2012

Nail Challenge Week 15: Easter Day Mani

Happy Easter, Lovelies! I hope you all are having a fabulous day celebrating with friends and family! This week's nail challenge is Easter Day. Obviously the first thing that comes to mind with Easter is bunnies and eggs; flowers and crosses; and pretty pastel colors!

Instead of using all pastels (I know a lot of girls used yellow and minty green), I stuck with just pink, purple, and blue. I wanted to keep it simple; so I did it in the same order on both hands... purple, pink blue, purple, pink, blue, etc.

 I used Essie "fiji," Sally Hansen Xtreme Wear "Lacy Lilac" (my favorite polish!), and Color Club "Hydrangea Kiss."
I was going to leave my nails just like that. I liked the simplicity of it. But it seemed too boring to blog about, so I added a little nail art using both my Sally Hansen Art Pens and my Migi Nail Art Pens.
I started by using the Sally Hansen pens just to do some little zigzag marks and dots on my nails--kinda like decorating Easter eggs. Then I decided to do a little something more on each middle finger as an accent nail and put tiny flowers using the Migi pens.

This is how it turned out:


I think they turned out pretty well; and in the end I almost wished I'd done flowers on all of them! But, I'm sure I'll get around to that in another nail challenge;)

What do you think? How did you do your nails for Easter? Have you tried the Sally Hansen and the Migi Nail Art pens? Do you have a favorite? :)

Tuesday, April 3, 2012

Nail Challenge Week 13: Ruffian Nails

Hi Lovelies! Yes, I am still a week behind, but tomorrow you will see that I am caught up;) For now, I want to show you my Ruffian Nails!

Now, I had *no* idea what "Ruffian Nails" were. "Ruffian" to me sounded like some kind of street urchin in Oliver Twist or something lol. So, I Googled. And I found out: "This manicure is created by Creative Nail Design (CND) especially for the NYFW Ruffian Fashion show. Since then everybody has been calling this manicure the Ruffian, or Ruffian inspired, manicure." To me, it just looks like an upside-down French manicure (if done correctly.)

Mine, however, is not nearly as nice as what it could be. But alas, the whole point of the Nail Challenge is just to try new things! Doesn't mean you'll master it the first time you try!

Here are the polishes I used:
After essie all in one base coat, I applied one coat of Color Club Jackie Oh! (from my March Birchbox!:) This polish goes on so smoothly and perfectly that one coat is all you need! And it is simply stunning!!
After that, one coat of Sally Hansen Xtreme Wear Black out:
And Hard Candy's Matte Top Coat, so the finished product looks like this!
I love how the matte makes it look! I think these colors together really compliment each other! Clearly I'm not a Ruffian expert (yet), but I really do like the effect; so I may try it again and do some other polishes and techniques as well!

Have you tried this mani? What do you think of it? Do you do it free hand or do you use french tips stickers?

Thursday, March 29, 2012

Haul Time! Ulta and Walgreens!

So Lovelies, there was a community yard sale this past weekend in my neighborhood! For those of you who don't know what that is, basically the community advertises and if you want to set up shop in your front yard, have at it! There's a lot of traffic that comes through and it's a good time to get rid of unwanted junk stuff!

I set out some jewelry (thanks everyone who gives me earrings as gifts, but MY EARS ARE NOT PIERCED, so I'm trying to make some money on it lol), shoes, nail polish, CDs, DVDs, video games, etc. and actually made a good little bit of cash! So, it was time to boost the American economy and go shopping!:)

First stop was Ulta. Oh, Ulta, how I love thee. I didn't really go for anything specific, just did a little browsing and left with the following:
1.) The China Glaze Magnetix polish in Drawn To You
2.) The Magnetix Magnet (sidenote, really?? $10 for each?! Can't there be some bargain deal or something! I suppose the bright side is, you won't need to buy it again with other magnetic polishes, but still...)
3.) Piggy Polish in Envy (for my Skittles Mani;)
4.) Orly polish in Out of This World (which to me looks slightly similar to Sinful Colors Daddy's Girl. Curious to see how they compare in swatches!)
5.) A new bottle of Seche Vite Dry Fast Top Coat (yes, I already have some; but I had the extra money and thought I'd pick up another; this is not something you want to run out of at an inopportune time!)
6.) Revlon Lip Butters in Sugar Plum and Gum Drop. (yes, I tried lip butter before; yes, I really didn't like it. But I've read some other reviews of girls who also didn't like Strawberry Shortcake [the one I had] and tried some other flavors and liked it better. Soooo, Revlon, I'm giving you a second chance. Plus it was buy one get one 50% off!) And I got to use my $3.50 off $10 or more coupon! I think all together I saved $7.25!! Yay! Bargain!:)

Then, I had to run to Walgreens. While there, I wandered through the makeup section (honestly, I could be at Walgreens for ANYTHING, medicine, tampons, a card, whatever; I always have to walk thru their makeup. I think that's why they put it so close to the front door, they know everyone will;)

You may recall during Christmas time I was obsessed with the Sinful Colors Extra Shiny Lipgloss and had to go to a couple different Walgreens to find them. Well! There's a limited edition *new* Sinful Colors lip gloss out there now! Lip Shine Lip Gloss--and they're all super glittery! I picked up the one that looked silvery called Crystallized! I hope when I do my full review I'll be able to get good enough pictures to show all the glitter! This was a dollar more than the regular lip glosses in December, so I'm hoping I'll love it as much or more!:)

Anyway, I picked up that and also got a new Sally Hansen Nail Art pen. My last white one went kinda crazy with my Skittles nails. Started leaking all over the place and whatnot!:( Now, at some point I want to do a whole comparison review of the Sally Hansen pens versus my Migi Nail Art pens... if you have opinions on the two, leave them in the comments!!:)

Have you done any shopping lately?? Picked up any new bargains?? And what do *you* think of Revlon lip butters?? I know they've been released in the UK now, so you British girls should even have an opinion!!:)

Monday, March 26, 2012

Nail Challenge Week 12: Skittles Nails

Helloooo Lovelies! And thanks for sticking around! I was blogging nearly every day for a while (okay, I was cheating, I'd write them all on Sunday and have them auto post, but still!:) Then after the cruise and trying to get back in the routine of work I slacked off. It's not for lack of material though! I have a whole list of things I need to write about, review, etc! So I promise I'm going to try to do better!

Now this was last week's challenge, and I've finally gotten around to do it! I was super excited about doing Skittles nails (which is why I still did this one instead of skipping it.) Skittles are one of my favorite candies! There's a little crunch on the outside then they're chewy and fruity on the inside! They come in a variety of different flavor packs (wildberry, tropical) but I stuck with just the original for my mani this week!

Started with Essie all in one base then I used Sinful Colors Unicorn, Sinful Colors Go Go Girl, Revlon Top Speed Grape, OPI He's My Boo, and Piggy Polish Envy (not just for toes!;)

After writing an S on each of them with Sally Hansen Nail Art Pen White and a coat of Seche Vite Fast Dry Top Coat you get this. Ta-da!


I was pretty pleased with how it turned out! When I was at Ulta today, the check out girl even asked, "Do you have skittles on your nails?" LOL Why, yes I do!:) I think it's a success when strangers know what's going on with my nails!

Did you do this week's challenge?? What other candies could you do on your nails? M&Ms maybe? Reeses Pieces? (yum!)

Monday, March 5, 2012

Nail Challenge Week 10: Polka Dot Nails

I was super excited about this week's nail challenge! Polka Dot Nails! To say I love polka dots would be a bit of an understatement as I have 2 pairs shoes, 3 shirts, 2 headbands, 4 panties, 2 bathing suits, 2 pairs of sunglasses, a lanyard and badge holder all in polka dot pattern. Not to mention my blog background?! Lol, so yes, I'm a fan of polka dots:) I've loved them for even longer than they've been popular! My favorite dress when I was little was navy blue with big white polka dots. I think it's a very classic and classy design!

I've also done polka dot nails before (it's probably one of the easiest nail art designs to master;) Keep in mind this is an old picture (pre-blogging days) so it's kinda messy!
So without further ado, let me just warn you that I got a LITTLE carried away with my nails this week. I was going to do the spots just on half the nail, kind of angled up, but... they were so fun! and colorful! and pretty! ... I just kept going...
No Flash
With Flash
For this look I used a coat of OPI base, two coats of Sally Hansen Hard as Nails Xtreme Wear in Black Out, spots from nearly all my Migi Nail Art pens, and a finishing coat from Seche Vite.

What do you think?? Did you do this week's challenge? Did you go basic black and white or switch it up some?? :)

Tuesday, February 21, 2012

Nail Challenge Week 8: Corset Nails

Hi Lovelies! I posted a couple weeks ago about a nail challenge I was going to start that a bunch of other bloggers are doing this year! This week's nail challenge was "corset nails." *sigh* I Googled a bunch and found many pictures of what other girls had done. (There are actually a lot more images of "corset nails" than I would have expected! This is not something I would normally think to do for my nails!)

Now before I get too far into showing my nails for this challenge, I want to post a disclaimer. If this is your first time reading my blog, PLEASE do not judge my nail skills on this post!! I am perfectly aware they turned out quite horribly, and I promise I am not THIS BAD at painting  my nails. lol.

Here is a pic to show you how they turned out:
You should be able to see at least kind of what I was TRYING to do. Hahaha. Kinda a lacy look up the sides and the crisscross straps/ribbon up the back:) Here is how I got to this point.
After OPI base coat, two coats Revlon Top Speed Cotton

A coat of Sally Hansen Xtreme Wear Lilac on either side and bottom

Konad Black with Shany Plate SH21 on sides

Migi Nail Art pen to create crisscross
So, there you have it! The good news is, I attempted it and count that as doing this week's challenge! The better news? I was able to take it off with polish remover right away and make my nails look better! haha

Did you try this week's challenge? Have you done "corset nails" before? How would you have done them? :)

LinkWithin

Related Posts Plugin for WordPress, Blogger...